OBJECTIVES:
-
Become familiar with still life observational drawing
-
Develop active critical thinking in using rule of "general to specific"
-
Practice patience and attentiveness by observing and drawing minor detail
DIRECTIONS:
-
Place one shoe on your desk, adjusting the angle to your preference
-
Draw a 1/2" border around the edge of your paper
-
Start by lightly drawing the major contour lines in your shoe (the outline, major changes between parts)
-
Make sure that your first drawing fits within the border from Step 2.
-
Retrace major contour lines while adding smaller lines to enhance detail (laces, stitching, logos)
-
DO NOT shade your shoe by hand!


CONTOUR LINES - lines which include but are not limited to the outline of an object. They also include edges of major features within an object WITHOUT depicting value.
7. When you finish your graphite drawing, check with Mr. Jones before proceeding to the light table
8. Place a new piece of paper on top of your drawing and turn on the light table
9. Using a fine point sharpie, retrace your original drawing onto your new paper
OBJECTIVES
Transform your line drawing of a shoe into an image emphasizing form through the use of value and color.
Experiment with Photoshop tools including Paint Bucket, Burn, Dodge, Paint Brush and graphics tablets.
DIRECTIONS
SET UP
-
Take a photo of your shoe drawing and send it to your Google Drive
-
Open your image in Photoshop
-
Unlock the layer (double-click on the padlock, click "OK" to unlock it)
-
Click on the square next to the trash can (bottom right corner) on the layers palette to create a new layer
-
Click on Layer 0. Reduce the opacity (upper right corner of the layers palette) to a point where you can still see your drawing, between 50%-75% opacity
-
Click on the new top layer
-
Now you have to choose how you want to draw a new outline: with your mouse OR with a drawing tablet
-
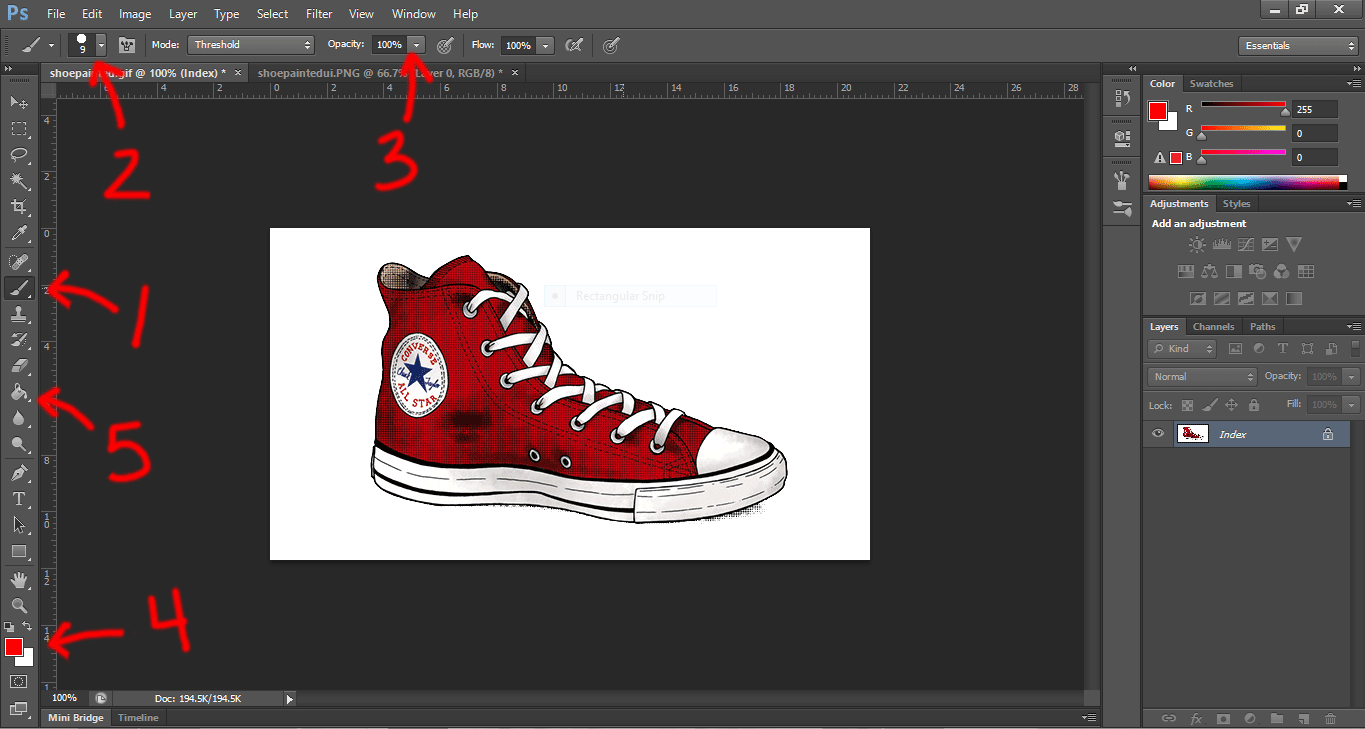
Click on the brush tool (1), choose a brush size (2) that complements the original drawing. Set the opacity to 100% (3) and that your color to black (4).
-
You can color your shoe with the paintbrush (good for small, detailed areas) or you can fill-in large spaces with the paint bucket tool (5) (sometimes under the Gradient tool)
-
Once you have a clean contour rendering of your shoe. Make a new layer, Layer > New > Layer... and drag this layer UNDER your outline.
-
All areas within the shoe should now be transparent. (You can check by turning off the eyeball on the Background layer.)
-
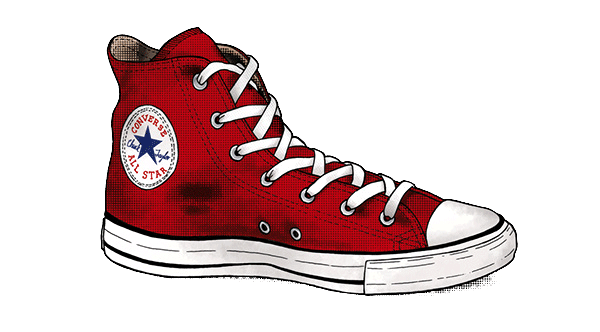
Color in the entire shoe on this new layer. Make it interesting with your color choices as shown in the example.
*You can even take textures from Google images that you like and put those in!
*Go for DETAILS! If you notice something on your shoe that you didn't include at first, put it in!
SHADING
-
Layer order: make sure your coloring layer is UNDER your outline layer.
-
With the paintdropper tool, select the main color of your shoe. Now open up the square "Color Picker" showing the color that you just selected with the paint dropper. Drop your selection down to a darker hue.
-
Choose a brush and make sure you have the Hardness turned down to ZERO.
-
Gently brush the mouse over the area where you want to create a shadow. You are doing it right if it takes several passes to build up the shadow.
-
Also, you may add highlights to areas of your shoe by repeating Step 2, but by picking a lighter hue instead.

